Blink camera glare at night is an issue that is reported by some Blink camera users. Blink sells a range of smart cameras including the Blink Mini indoor plug-in smart security camera, Blink indoor wireless security camera, and Blink outdoor wireless camera. Unfortunately, these home security cameras can sometimes have glare issues where the image quality is bad, due to light reflecting into the camera at night time. Let’s look at how to fix this glare night-time issue and the possible causes that generate this issue.
The Possible Causes Of The Glare Problem In Blink Cameras
There are two common reasons why a blink camera may create some glare at night, and they are:
If you place an indoor Blink camera inside a window or door which is made of glass, but point it outside. When you turn on the camera’s infrared feature, the glass in between the camera and the exterior of your house will create a glare. Anything white or reflective affects the IR feature to shine light through it. Instead, the light bounces back and that’s what creates glare.
Another common cause of this problem is when you point the camera towards a spot that has too much light. It could be an overly illuminated front door area or porch that is excessively lit up with a powerful front door light or porch light, respectively.
How To Fix Blink Camera Glare At Night (4 Easy Solutions)
1. Turn Off the Infrared(IR) Light
If you place the camera inside a window or door which is made of glass, turn off the infrared light and instead illuminate your camera’s field of view with a third-party source of light. You can use a good product such as the dimmable and motion-detection Philips Hue outdoor light bulbs. This bulb will only turn on when it detects animate motion in its field of view so that the camera can effectively record the event without being affected by the glare issue.
If you cannot have an external source of illumination on your camera’s FOV(field of view), lower your IR(infrared brightness) so that it’s not too bright to where it causes glare.
If not, change the location of your camera. For example, you can move it a short distance away from the reflective surface, but still inside the house. If not, you can place it somewhere outside where it’s safe from the elements. Remember that the Blink indoor cameras are not weather-resistant.
This means elements such as rain, snow, and direct sunlight could easily interfere with their primary function. For instance, you can have your camera on a covered patio or just above your front door where it’s sheltered so long as the field of view is well-lit.
You can use the Blink camera stand or mount for this purpose. Not only will this trick solve the glare problem, but it will also make a significant difference in your image and video quality.
2. Reduce Illumination or Change Its Source
If you determine that too much external light is what’s causing the problem, reduce the light or change its source. Philips Hue has a wide range of dimmable outdoor lights that can perfectly work with your Blink home security camera system. If you are using one, simply lower the brightness level of the bulb by dimming it. This may help solve the glare problem by reducing the amount of light getting reflected back to the camera’s lens to create glare.
If you aren’t, you can easily invest in the right external bulb, which doesn’t generate too much light for your Blink, and allows you to adjust the brightness levels as needed. You can get one from your nearest electronics store or online, especially on Amazon and other online marketplaces like Amazon, BestBuy, and eBay.
Another common cause of this problem is when you point the camera towards a spot that has too much light. It could be an overly illuminated front door area or porch that is excessively lit up with a powerful front door light or porch light, respectively.
3. Tint Your Windows
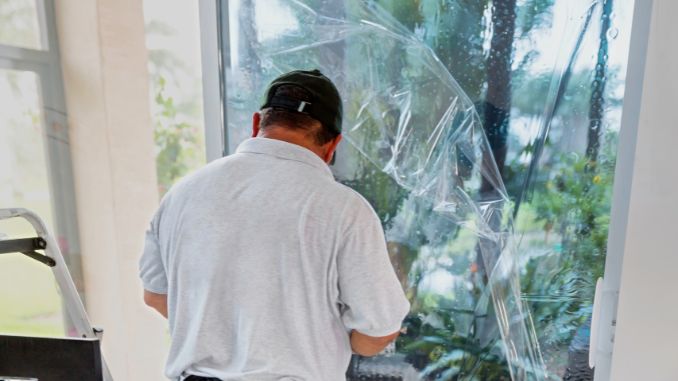
Tinting your window will help prevent glare regardless of its cause of it. Whether it’s a reflective surface on your camera lens’s path when the infrared light is enabled or an overly illuminated FOV, adding a sight shade to your window will help resolve this problem.
Usually, there is a special tint that’s normally used to tint windows. It’s designed to absorb light and that’s how it prevents the glare problem that is normally experienced with the Blink home security camera system.
Apart from that, tinting your window comes with other amazing benefits. For example, it adds to your home’s privacy, and aesthetic appeal, not to mention that it helps keep your home cooler during the hot periods.
4. Use Infrared Light Outside the Reflective Surface
Another possible fix is to try adding an infrared light source outside the reflective surface(usually glass) between your camera and its field of view. Think of when you install the camera in your window but point it outside so that there’s a glass between it and the FOV.
The Univivi IR Illuminator can be a good solution for this purpose. This external infrared light source for home security cameras offers perfect illumination for your camera’s FOV over a wider angle of up to 90 degrees, thanks to its set of 8 powerful LED bulbs.
Final Thoughts
Blink home security cameras are reliable. However, just like other home security cameras such as Ring and Wyze, these American-made cameras are prone to glare. This problem normally occurs if you place your Blink indoor camera inside the window or door(which is made of glass), but point it outside. When you turn on the camera’s infrared feature, the glass in between the camera and the field of view automatically creates a glare due to light reflection. The good news is that you can resolve it in many ways, which include turning off the infrared light and reducing illumination or changing its source. Other proven tricks include tinting your windows and using an infrared light outside the reflective surface.
