Ring Floodlight Cameras take home security to a whole new level. You can have a few of these lying around your house to have constant visibility with high-quality video anywhere at your home.
They’re easy to set, easy to use, and they only need power and a stable wifi connection to operate.
But can they be mounted upside down? Yes, they can. The mounting mechanism while upside down is the same as usual.
The problem is that you get a restricted range of visibility, which counters the main advantage of buying the whole thing.
The good news is that we have two solutions for that. Let’s see the possibility of effectively mounting the Ring floodlight camera upside down.
But first, let’s learn what Ring floodlight cameras are and how to typically mount them before mounting them upside down.
What Are Ring Floodlight Cameras?

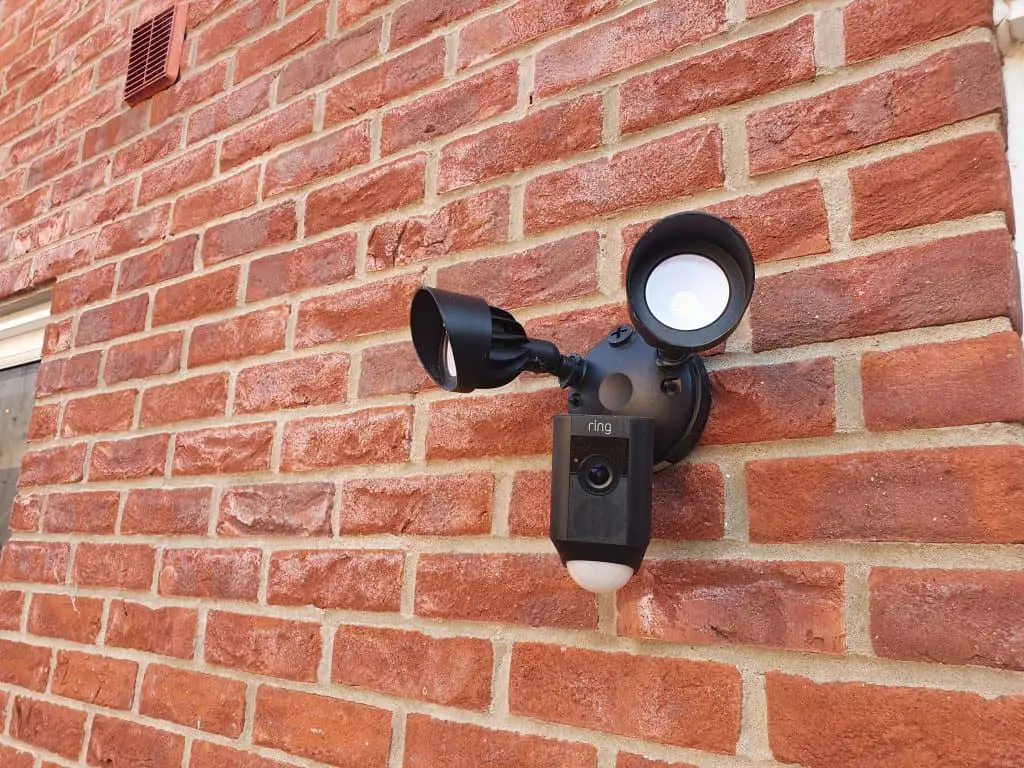
Ring Floodlight Cameras are arguably the best home security cameras in the meantime. Admittedly, they cost quite a bit, but they’re worth every dollar.
They’re wall-mounted cameras that record high-quality video using a wide-angle lens.
They also come with two floodlights for the best visibility in low-light conditions. Additionally, they could be used as a reliable two-way communication method.
Ring floodlight cameras increase your home security tenfold. In addition, because of their wide-angle lens, you’ll need fewer cameras around your household compared to standard cameras to cover all angles.
How To Mount The Ring Camera Normally
If you don’t know how to mount Ring cameras in their normal position, you may find it challenging to mount them upside down.
First things first, it’s essential to know that these cameras require a physical connection to your home. Exterior light connections usually do the trick.
Once the power source is ready, all you need to do is follow the manual instructions that come with your purchase. Don’t worry; we’ll cover that too! Here’s how:
Mount the Bracket
See that round cover that goes in the back of the camera? Pass your wiring through it, nail it, and fix the wiring in place.
Then, nail the bracket securely to the wall and make sure that it’s fixed in place by trying to dislodge it with your hands.
Place the Ring Camera
Simply mount up the rest of the camera housing on the bracket. Make sure that it’s fitting correctly before you start tightening the screws.
Once you are finished, the black or white dome should be facing downwards.
Can You Mount The Ring Camera Anywhere?
As long as you can provide physical wiring, you can virtually place the Ring floodlight camera anywhere. You can put it on a roof overhang, soffits, or eaves.
However, there are a few factors that you should keep in mind:
Wiring
If you decide to hang your Ring camera on eaves or soffits, you’ll most likely need an electrician as these areas don’t usually have wiring in them.
Visibility
You need to make sure that the camera lens is not obstructed by an overhanging object or anything else. After all, the camera is useless if it can’t see.
Dryness
The surface you attach your camera to should be dry and away from any possible leaking. If you can’t guarantee the dryness of your location, then use silicone to protect your camera as much as you can.
Apply a silicone ring around the camera’s back bracket to prevent any water from going inside.
Keep in mind that when you want to hang the camera on a soffit or an eave, you’ll need to consider the path that water takes as it slides down your roof. Even silicon won’t save the camera if it’s placed in the way of sliding water.
Why Is It Hard To Hang The Ring Camera Upside Down?
Let’s be more specific; the process of hanging the Ring camera upside down isn’t any different from the normal hanging.
The problem lies in two other things:
The Camera Weight
The camera weight isn’t a problem on vertical walls, so it shouldn’t be a problem on the ceiling, right?
Theoretically, yes. But in reality, many ceilings are drywall, and nail fixation alone won’t be enough to keep that camera in place without complications.
Your drywall ceiling should be anchor-supported for it to be able to hold the weight of the Ring camera.
The Camera Angle
When the Ring camera is hung upside down, its vision will be reduced considerably. So the logical solution would be to move the camera in its hinge to provide the best visibility, right?
This is when things get strange. For some reason, Ring floodlight cameras don’t have the same motion range if you decide to tilt them the opposite way.
Your camera lens will still have visibility, but it won’t be nearly as good as when the camera is mounted normally.
To hang your Ring floodlight camera upside down while dodging the limited visibility problem, read on.
How To Effectively Hang The Ring Floodlight Camera Upside Down
There are two ways to increase the visibility of your camera while it’s upside down. One of them gives you a slightly better range of visibility without affecting your warranty (hopefully.)
The other one is more of a DIY hack, but you should say goodbye to your warranty if you decide to apply this one.
Method #1: The Flip
When your camera is hung upside down, its range of visibility is reduced to like 40%. What you will do is rotate the camera head 180 degrees to swap the field of vision to be 60%.
(Keep in mind that these numbers are metaphorical to explain what you would gain from rotating the camera 180 degrees)
To flip your camera, you need to dislodge its ball from the socket. Make sure that you have enough wire slack to move the camera with ease, then loose the screw that keeps the ball secure in the socket.
As you do that, support the camera with your hands because its weight can either dislodge the wires or cut them. The cut wires are easy to deal with, but if the camera falls on the ground, there’s no telling how much damage will happen.
Once the ball is out of the socket, rotate the camera 180 degrees to flip the visibility range from 40% to 60% (theoretically.)
This won’t break your warranty, but if you send your camera to Ring for any reason, make sure to return the camera housing to its original position.
Method #2: The Grind
This method will break your warranty, but it will give you the full range of visibility as if you have never flipped over your camera.
The socket of the ball allows for a good motion of the camera in one direction only; what we’ll do is grind the other side of the plastic to give a similar range of movement in the opposite direction.
In the previous method, we loosened the screw. In this one, we’ll have to remove the screw entirely. The screw is fixed in place with a nut; be careful not to lose that.
When the screw is unscrewed, remove the camera from the socket. Make sure that you have enough wire slack before you remove the camera housing from its place.
In the opposite direction of the plastic socket, you need to make a U-shaped recess or relief. You can do that by any grinding power tool or a small saw.
After making your new joint, just put the camera back in its place. The new recess will allow the camera to be tipped backward to enjoy the full range even when upside down.
The Verdict
So, with a few considerations and modifications, it’s possible to mount the Ring floodlight camera upside down while still getting its full range of visibility.
Keep in mind that even our first method could be considered tampering with the camera’s hardware and could sometimes void your warranty.
If you really need the upside-down mount without sacrificing any visibility, and you aren’t worried too much about the warranty, then you can go ahead and try one of those two methods.