One of Philips’ greatest creations, the Hue Lightstrip could be simply what every modern home needs. If you prefer warm ambient lighting while having a relaxing bath or chilling in front of the TV, you might’ve considered investing in Hue Lightstrips.
Yet, to make the best use of the entire strip and minimize your wastes, you may wonder how to cut, re-attach, and bend your Hue Lightstrips. I mean, is that even possible?
In this article, I’ll go through everything you need to know regarding this topic, so stick around for some guidance!
Can You Cut, Re-Attach, and Bend Hue Lightstrips to Your Liking?
The answer to this question is entirely based on the model of Hue Lightstrip that you’re ready to install in your home. This is because Philips Hue’s Indoor Lightstrips are available in several versions, and these are:
- Hue Lightstrip (the original version)
- Hue Lightstrip Plus V2
- Hue Lightstrip Plus V3
- Hue Lightstrip Plus V4
But, how are they different in their ability to be bent, cut, and re-attached?
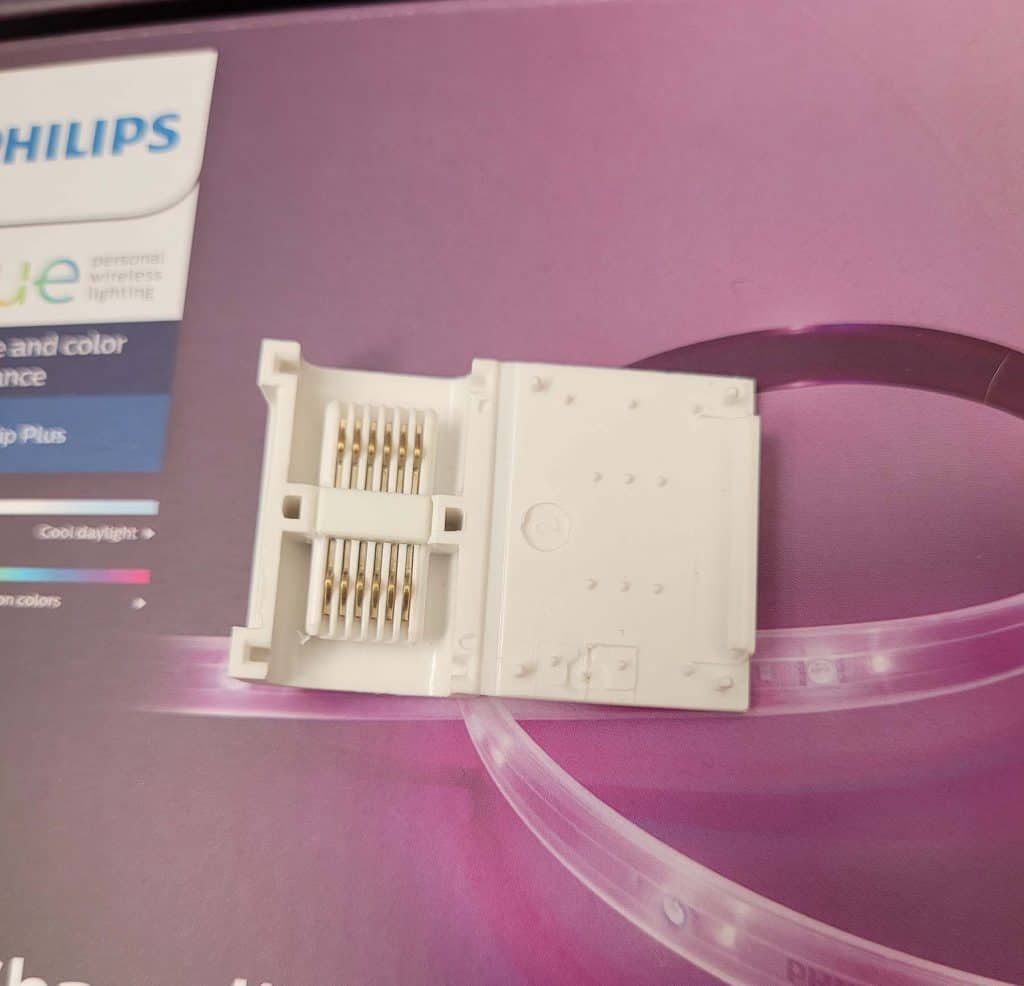
Well, you should know that all these models support bending around corners and edges, so that’s a relief. However, when it comes to cutting and reconnecting, only the latest generation, the Plus V4, offers you a connector to let you use the parts you’ve cut once again.
In earlier generations, you can still cut a long lightstrip into 13-inch sections, but it could be much more challenging to make them work again. In this case, you’ll probably need the help of third-party connectors.
How to Bend Hue Lightstrips Around Corners
Now that we’ve discussed the differences between Hue models, it’s time to learn how to bend a single lightstrip around curves or sharp corners. Thankfully, all Hue versions can be bent in the same way:
Generally, if the bending angle is a simple one, say, greater than 90 degrees, you’ll just have to stretch the lighstrip over the bend with no trouble. The flexible material of the strip will allow it.
On the other hand, if it’s a sharper bend, things could be trickier. Here, you might be worried that you’ll damage the lightstrip somehow. In this case, you’ll have two bending methods to consider.
Method 1: Use the “Cut Here” Marks to Know Where to Bend the Lightstrip
All Hue lightstrips give you the chance to cut them at 13-inch intervals. Since you know they are safe to cut, these “cut here” points are perfect spots for directly bending the strip with your hands.
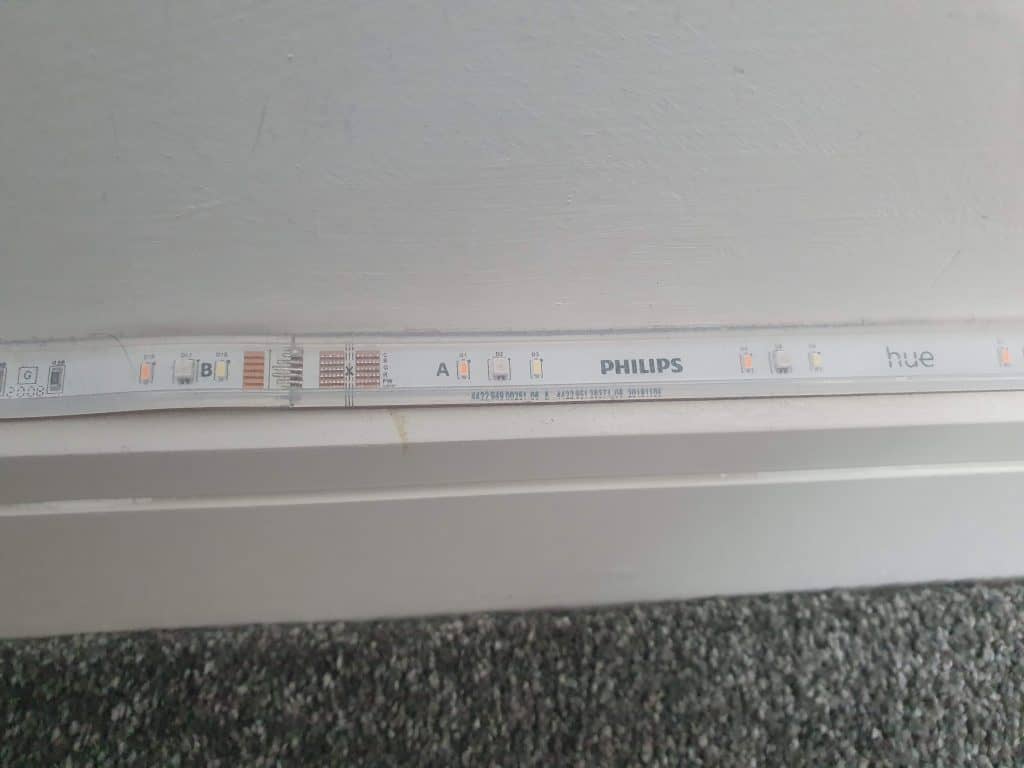
Just make sure you don’t bend the lightstrip where there are light diodes, resistors, and other essential parts of the LED light.
For a mistake-free bend, pinch the strip 45 degrees in the opposite direction of your intended bend. Then, fold the strip back the way that you want it to be at a 90-degree angle.
Method 2: Buy a Corner Connector
If the previous method doesn’t seem like the best solution to you, you could always invest in a corner joint instead. This third-party connector allows you to attach two cut sections of a lightstrip to form a cleaner corner.
Some people might favor this method over directly bending a lightstrip because it doesn’t cause bumps, resulting in a seamless finish.
How to Cut and Reattach Hue Lightstrips
Now, here’s where things become a notch trickier. I mean, yes, V4 Lighstrips allow you to reconnect a cut section of a strip with another one using the connector included in the pack:
However, it’s not as simple as it seems.
See, if you cut your lighstrip at the 13-inch mark for later use, you won’t be able to reattach it to your pre-installed strip without investing in another Lightstrip Plus V4 kit (an original, or extension, kit).
The reason behind this is that your off-cut will need to be powered and run through a controller. And Hue controllers can’t be bought separately. Therefore, the only other option is buying another Lightstrip V4 kit, which might not be cost-effective for most people.
So, is there a way to cut and reattach Hue lighstrips without having to spend a fortune? Well, you can always use a third-party adapter to make things work.
Adapters, such as ones sold by Litcessory, let you connect more than just two Hue Lighstrips, and they’re compatible with all Hue generations. All you’ll have to do is attach the connector to the Hue Lightstrip controller, then link the splitter to the connector.
After that, you’ll just need to attach another connector to a Hue Lightstrip, connecting them both to the splitter. The other sections of the splitter will allow you to plug in other Hue Lightstrip extensions.
Is It Possible to Remove a Hue Lightstrip and Reuse It Without Damaging the Wall Paint?
Yes. If you’re renovating your house or moving to another one, you may need to detach the lightstrips you’ve fixed to the wall and stick them somewhere else. But how can you do it without removing parts of the paint?
Well, first of all, you must unplug the lightstrip. Then, using a blowdryer, heat the adhesive backing until it no longer sticks to the surface of your wall. Afterward, you’ll easily be able to pull the lightstrip free without damaging the paint.
When you’re ready to place the lightstrip somewhere else, simply use double-sided tape to stick the strip wherever you see fit.
Why Won’t My Lightstrip Stick to the Wall?

Hue Lightstrips usually have no problems when you fasten them onto walls. However, in some cases, they might not stick to the surface as easily as they should.
The first thing that could cause this is a wall that isn’t smooth enough. In order to stick securely, the adhesive on the back of a lightstrip will need a smooth surface without any grooves.
See, if the surface is too rough, there will be fewer points of contact with the adhesive, and the strip will likely come right off.
The second thing to keep in mind is that some wall finishes just don’t work great with lightstrips. If the surface has a glossy or oily finish, the lightstrip backing adhesive could easily slide off the wall. In this scenario, you’ll want to consider other mounting options to keep the strip in place.
Lastly, the environment where you live might be the culprit behind this occurrence after all!
See, hot climates can affect the quality of the adhesive, even if the lightstrip successfully sticks to the wall in the beginning. After an extraordinarily hot day, the rise in temperature might lead the adhesive to melt and lose contact with the wall.
The same goes if you live in a region where high humidity levels are the norm. Having too much water vapor in the air could cause the lightstrips to become loose and fall down.
Where Can I Use Hue Lightstrips in My House?
LED lightstrips are perfect for various places in your house to give you cozy effects that’ll welcome you after a tough day at work. In this section, I’ll recommend several uses for Philips’ Hue Lightstrips.
In the Living Room
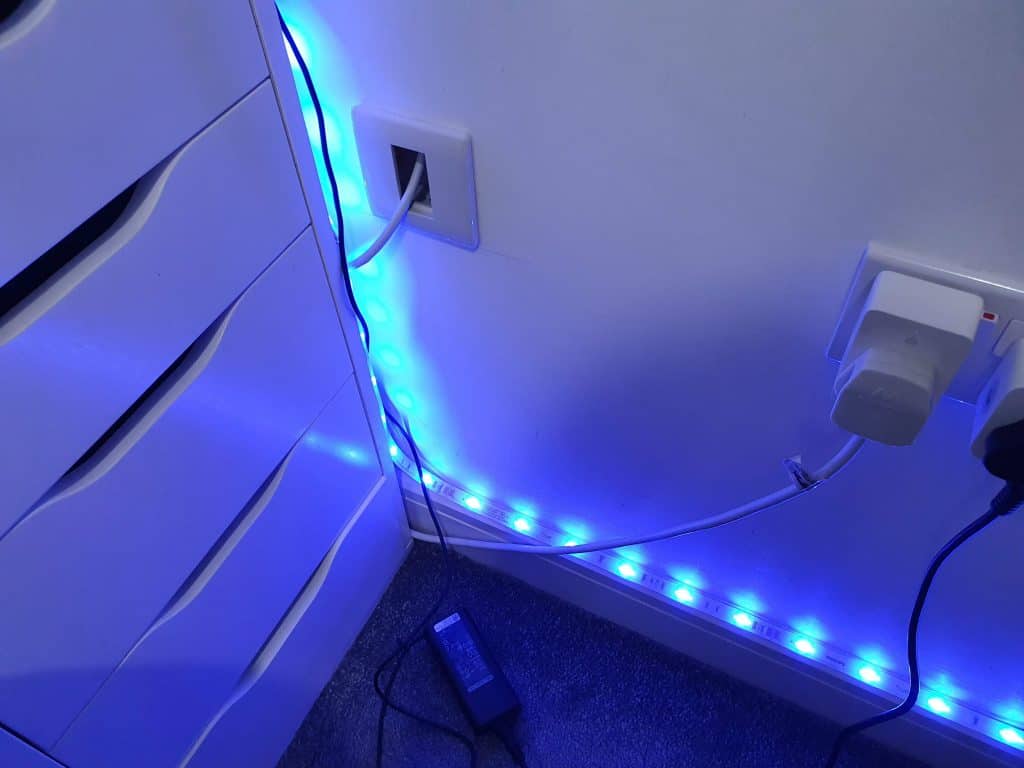
Hue Lightstrips can give you wonderful ambient light while you’re lounging on the couch or having a snack in front of the TV. You could position the lightstrips behind your television screen and underneath TV unit shelves.
Better still, some Hue Lightstrip models let you sync them to whatever you’re watching on your screen using HueSync. That might be just perfect for a movie night with friends!
You can also use the strips around the ceiling for a warm glow when it’s late at night.
In the Bedroom
Much like the living room, lightstrips can be placed to line your bedroom ceiling for a much-needed romantic effect. If you’re ready to have a touch of sunset appeal in your room, use warm colors for a soothing effect.
Again, you can always use the LED strips underneath bookshelves to make them stand out, or even behind your bed’s headboard for extra coziness.
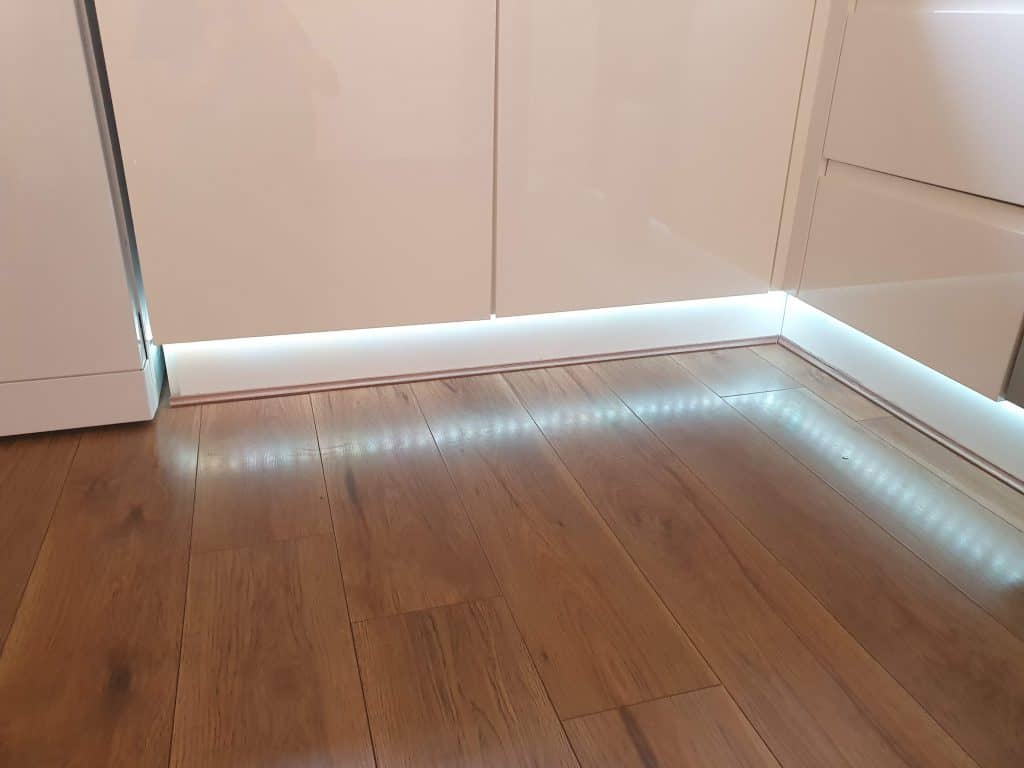
In the Kitchen
Hue lightstrips could be wonderful additions to your kitchen, especially right under cabinets. Not only will they make the space more relaxing, but this extra light could also be helpful when you’re dicing vegetables on the counter.
Consider running the lengths of Hue lightstrips underneath all shelves and counters to transform the entire appearance of your kitchen.
To Wrap It Up
Learning how to deal with your Hue Lightstrip can be tricky at first. Hopefully, after reading this guide on how to cut, re-attach, and bend your Hue Lightstrips, things probably appear more simple now.
As long as you cut the strips in the right places, know where to create your bends, and buy a connector or two, you should be on the safe side!
